
View Key Pair Details
The Key Details window shows everything about a key: who it belongs to, its primary key and subkeys, the signatures on it, and the actions you can take.
To open it:
-
Right-click a key in the Key ToolBox or the KeyPair Management window and choose Show Key Details. You can also double-click the key.
-
The Key Details window opens.
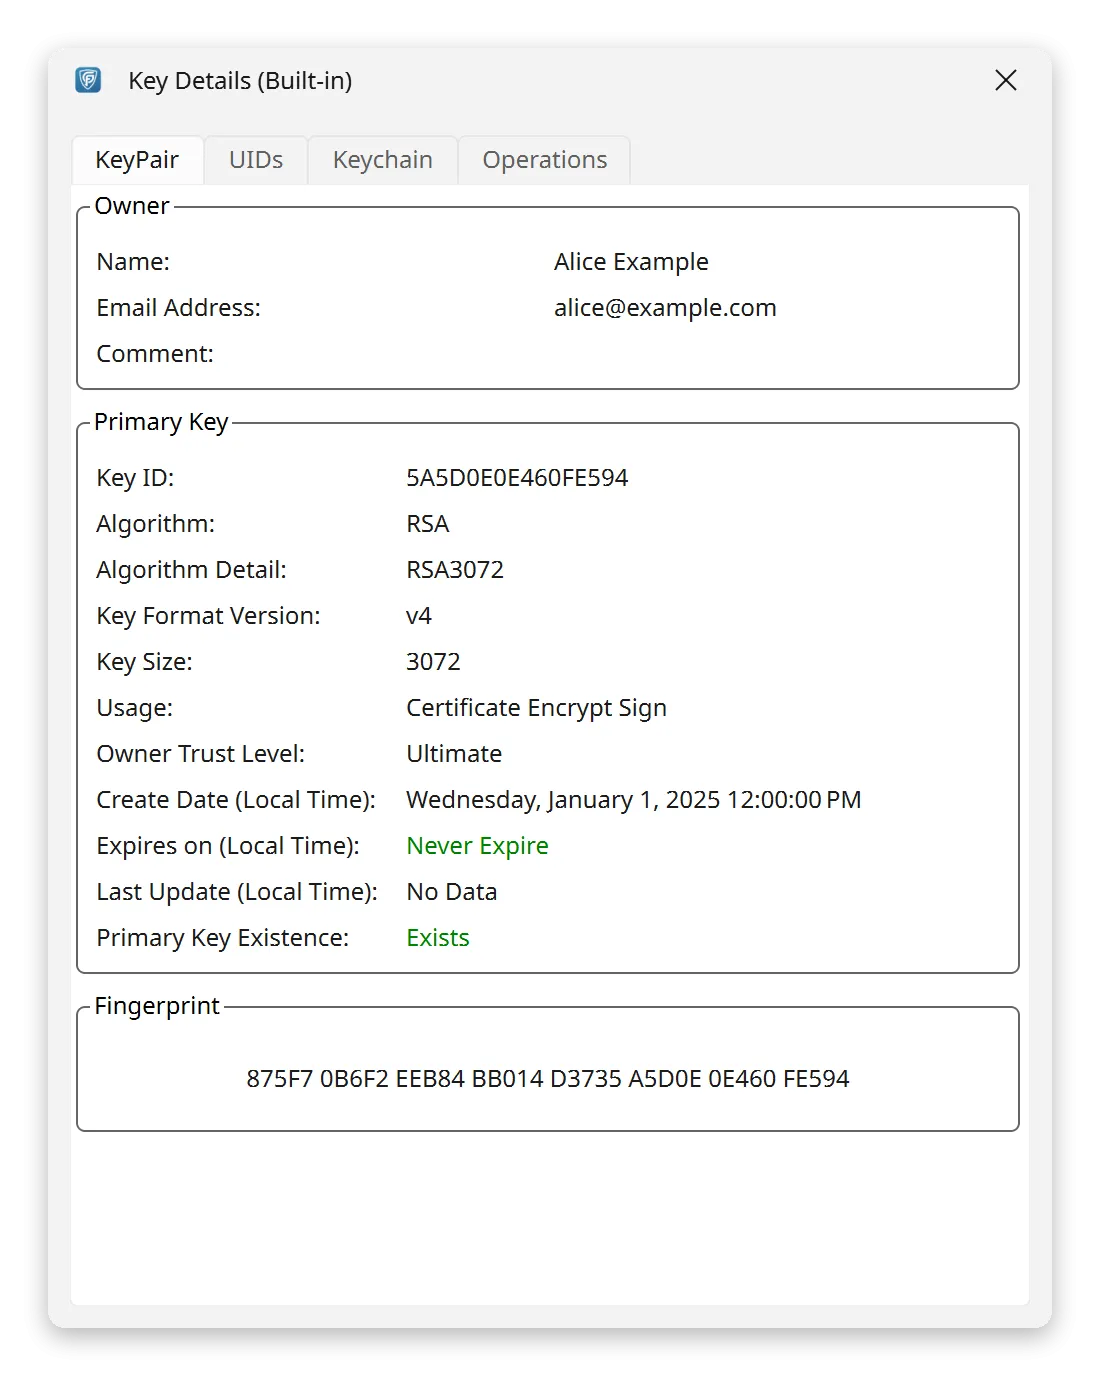
The window has these tabs: KeyPair, UIDs, Keychain and Operations. A key with a photo in it also gets a Photo IDs tab, which shows the photos.
A revoked key shows only the KeyPair tab. You can read its details, but there is nothing left to do with it.
General Info
Section titled “General Info”This part is on the KeyPair tab. It helps you manage the key. Here is what each piece means.
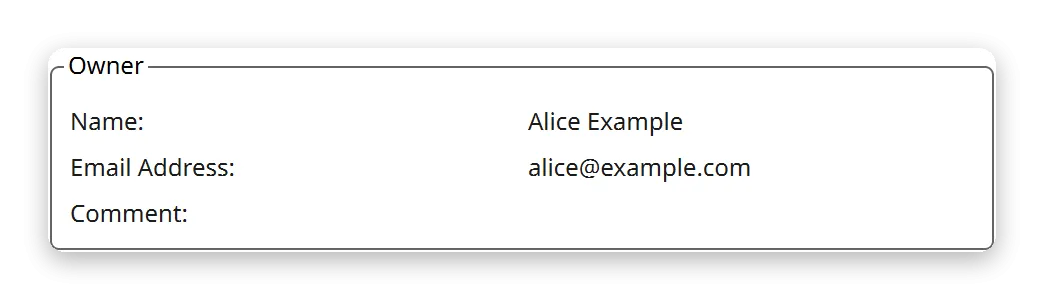
Who the key belongs to. The box shows the Name, Email Address and Comment of the key’s primary UID (User ID).
You can change the owner. See UID Info.
-
On the UIDs tab, click New UID to add a new UID.
-
With the GnuPG engine, you are done. The window says “The new User ID will be set as the primary User ID.”, and GpgFrontend does that for you.
With the rPGP engine, right-click the new UID and choose Set As Primary.
Primary Key
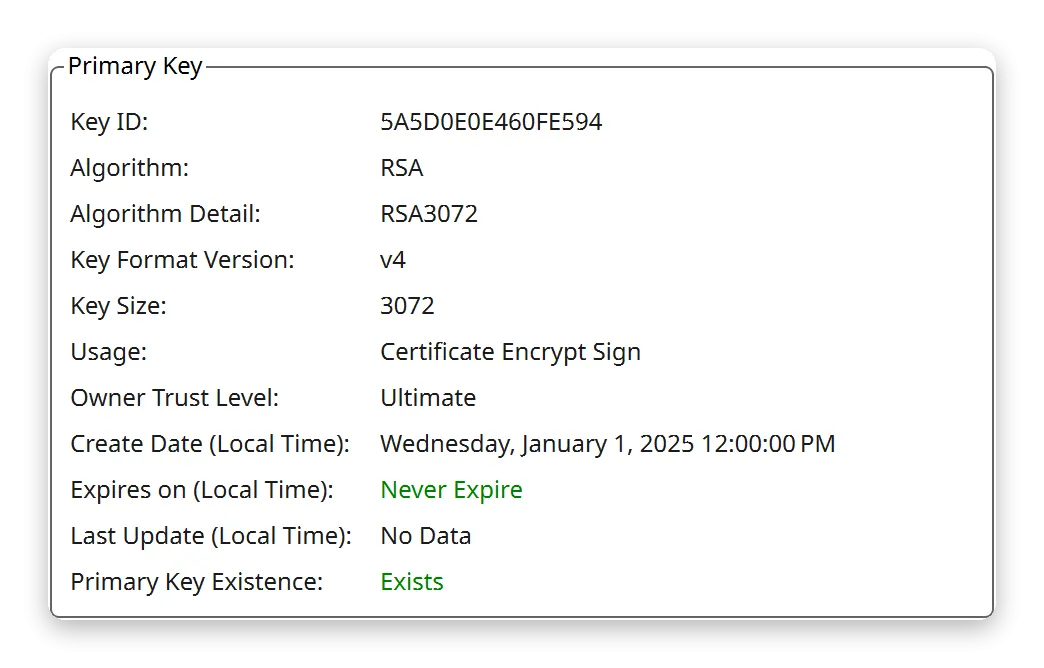
Section titled “Primary Key”The primary key is the main key of the key pair. You need its private part to manage the key pair, for example to add or revoke subkeys. To learn more, see Fundamental Concepts.
A “missing” primary key means that only the private part of the primary key is not there. The whole key is not gone. Remember: the primary key and every subkey each have a public part and a private part.
Key ID
Section titled “Key ID”A short ID for the key. It is set when the key is made and never changes. This is the primary key’s ID. It is shorter and easier to read than the fingerprint.
Click the Key ID to copy it. A small note, Copied to clipboard, confirms it.
Algorithm
Section titled “Algorithm”The algorithm (the math) the primary key was made with. It decides what the key can do. For example, RSA can encrypt and sign, while DSA can only sign. Newer elliptic-curve algorithms, such as ECDH (for encryption) and ECDSA (for signatures), are just as strong with much shorter keys.
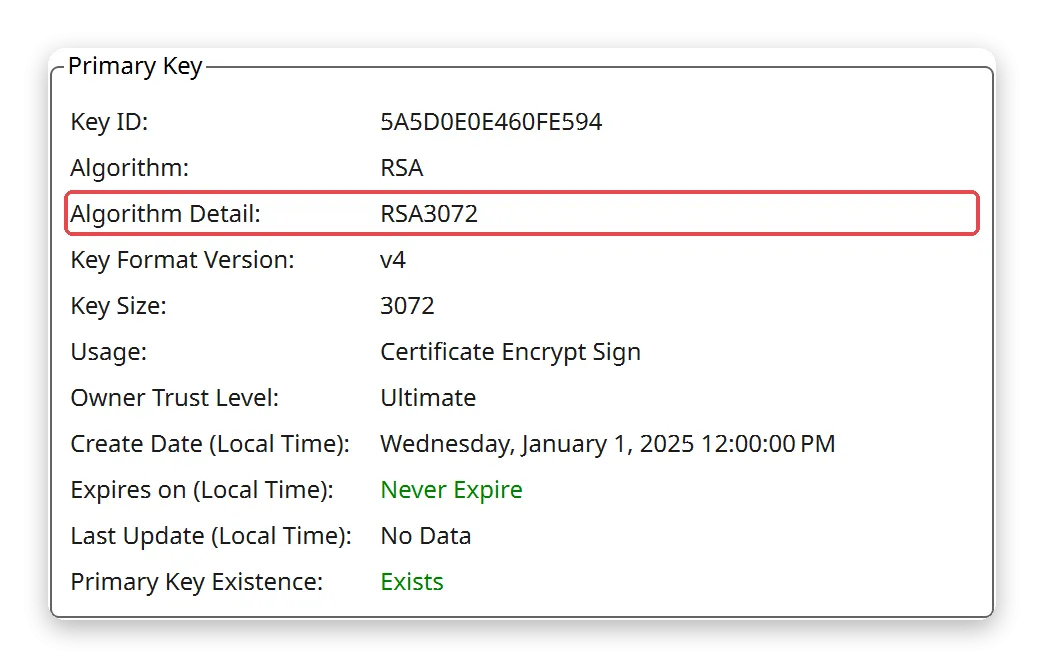
Algorithm Detail
Section titled “Algorithm Detail”Shows the key type and length together. It is sometimes more exact than the Algorithm field. For example, it names the curve, such as ED25519 or NISTP256.
Key Format Version
Section titled “Key Format Version”Which key format the primary key uses, shown as v4, v5, or v6. If
GpgFrontend cannot tell the format, this field is not shown.
v4is the widely compatible default, from the older OpenPGP standard.v6is the format from the current OpenPGP standard, RFC 9580. Post-quantum keys need it.v5is the format from LibrePGP, a separate standard that split off from OpenPGP. GnuPG 2.5 and later can make and use v5 keys.
The two standards are not compatible with each other. A v5 key works with GnuPG and other LibrePGP tools, and a v6 key works with RFC 9580 tools. Many tools support only one of the two.
Key Size
Section titled “Key Size”The length of the primary key, in bits. Longer keys are harder to break but slower to use. For a new RSA key, use 3072 bits or more. Older 2048-bit RSA keys still work.
What the key pair can do. This combines what the primary key and all subkeys can do. For example, if any subkey can sign, Sign is listed here. The possible values are:
- Certificate: it can certify (sign) other keys and its own subkeys.
- Encrypt
- Sign
- Auth: it can prove who you are, for example to log in.
Owner Trust Level
Section titled “Owner Trust Level”How much you trust this key’s owner to check and certify other people’s keys. See Trust Chain Management.
GnuPG only This field is only shown with the GnuPG engine. The rPGP engine has no owner trust, so the field is hidden.
Create Date (Local Time)
Section titled “Create Date (Local Time)”When the primary key was made, shown in your local time.
Expires on (Local Time)
Section titled “Expires on (Local Time)”When the primary key expires, or Never Expire. After that date the key can’t be used, and its subkeys stop working too. You can change the date whenever you like, or set the key to never expire, as long as you have the primary key’s private part.
Last Update (Local Time)
Section titled “Last Update (Local Time)”When the key pair’s content last changed. Adding a UID or subkey counts as a change. If this date is not known, it says No Data.
Primary Key Existence
Section titled “Primary Key Existence”Whether the primary key’s private part is in this key database, shown as Exists (in green) or Not Exists (in red). For a key you only have the public part of, it always says Not Exists.
If it is missing but the key pair still has usable private subkeys, you can keep using the key for normal tasks. You just can’t change the key pair (for example, add UIDs or subkeys) or certify other keys with it. See Keep Your Primary Key Offline.
Warnings at the Bottom
Section titled “Warnings at the Bottom”If something is wrong with the primary key, a warning appears at the bottom of the KeyPair tab:
- Warning: The primary key has expired.
- Warning: The primary key has been revoked.
- Warning: The primary key is not exists. You have some private subkeys, but not the private part of the primary key.
Fingerprint
Section titled “Fingerprint”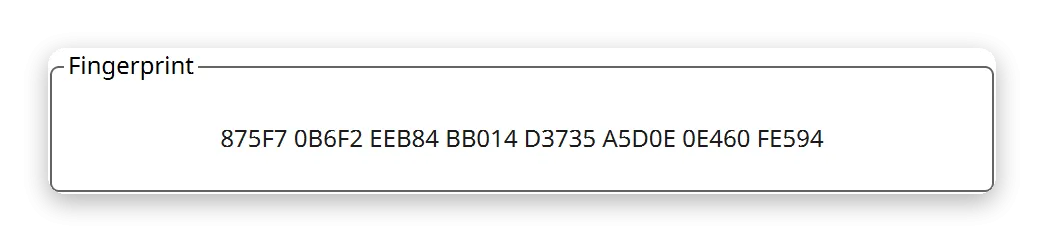
The fingerprint is a long code that is different for every key. People compare it to check that a key is the one they expect. This is the primary key’s fingerprint.
Click the fingerprint to copy it. The copy has no spaces, even though the window shows the fingerprint in groups.
UID Info
Section titled “UID Info”This part is on the UIDs tab. A User ID (UID) is the label that says who a key belongs to, like a name tag. It gives you a rough idea whether a key is the one you expect. To be sure, compare fingerprints. A key can have several UIDs, but only one primary UID, which is always shown first.
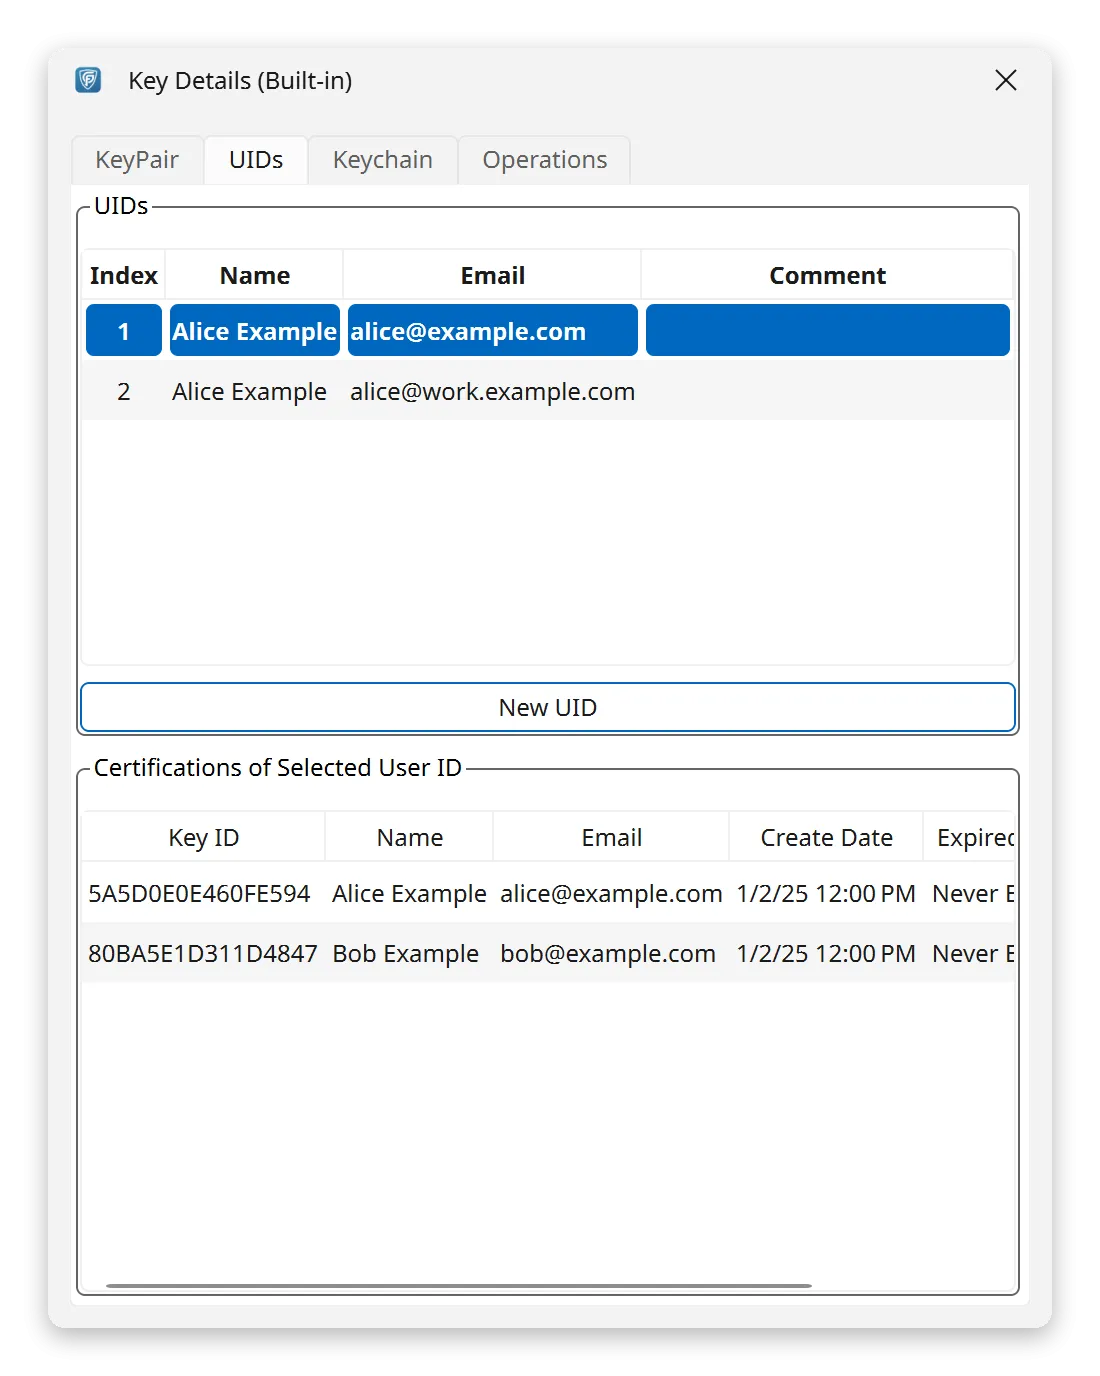
Each UID has three parts: Name, Email, and Comment. To add one, click New UID. These rules apply:
- The name is required. If it is shorter than five characters, GpgFrontend asks you to confirm it.
- The email is optional. If you fill it in, it must be a valid email address.
- The comment is optional.
- The name and comment cannot contain
(,),<or>.
Change or Remove a UID
Section titled “Change or Remove a UID”Right-click a UID in the list to see what you can do with it:
- Set As Primary: make this UID the primary UID.
- Revoke UID: mark the UID as no longer valid. GpgFrontend asks you to confirm, then asks for a reason. This cannot be undone. Others see the revoked UID once you share the updated key.
- Delete UID: remove the UID from your copy of the key. Others who already have your key still see it. GpgFrontend asks you to confirm.
- Certify User ID…: see Certifications on a UID.
Set As Primary, Revoke UID and Delete UID only appear when you have the private part of the primary key. They are greyed out for the primary UID.
You cannot delete the primary UID. On a v4 key you also cannot delete the last UID, because the key needs it to keep working. Add a new UID first if you want to replace it. This rule is new in v2.2.3.
Certifications on a UID
Section titled “Certifications on a UID”The lower part of the window, Certifications of Selected User ID, shows the certifications on the UID you clicked in the list above. A certification is a signature that another key put on the UID.
Certifications are how trust is built. When someone gets your public key, they can certify your UID with their key to say they checked it. Then they can share the certified key with others. The more people who do this, the more trustworthy the key looks. Uploading certifications to a public key server has drawbacks, so read Signing UIDs first.
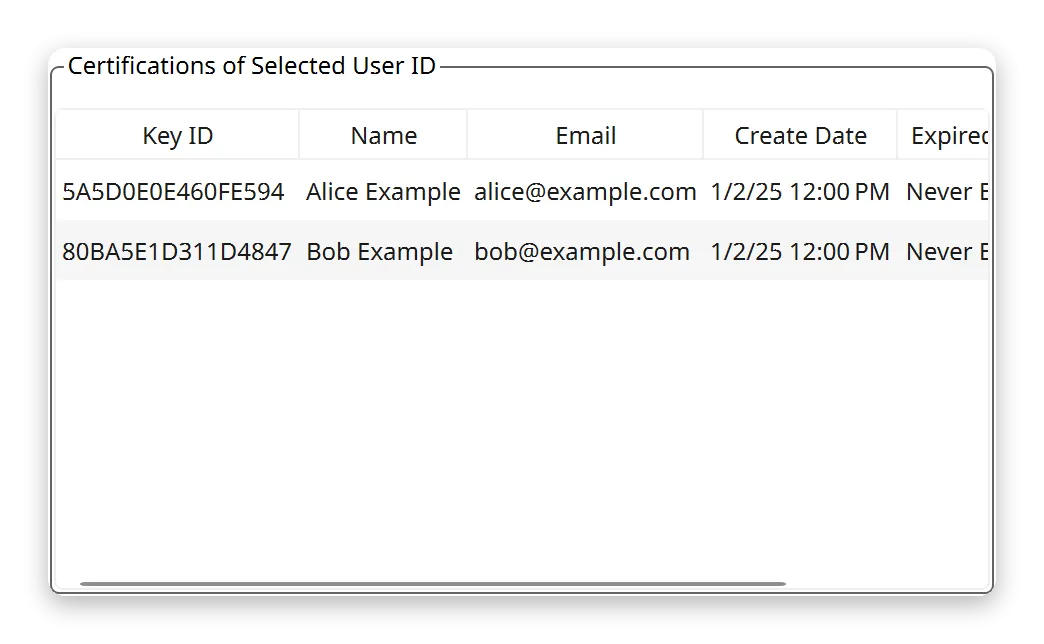
You can also certify a UID with one of your own private keys. Right-click the UID and choose Certify User ID…. To take back a certification you made, right-click it in the lower part and choose Revoke Certification…. See Trust Chain Management.
Some certifications do not show the signer’s name, as in the image above. This happens when you don’t have the signer’s key. The signer’s Key ID is still shown. Use it to find and import that key, for example from a key server.
Subkey Info
Section titled “Subkey Info”A key pair has one primary key and any number of subkeys. The primary key stands for your identity. The subkeys do the daily work, such as signing and encryption. For why this helps and how to add a subkey, see Generate and Use Subkeys.
Two more things to know:
- Overlap: if more than one subkey can sign, GpgFrontend asks which one to use when you sign text or a file.
- More algorithms: subkeys can use more algorithms than the primary key. For daily use this makes no difference.
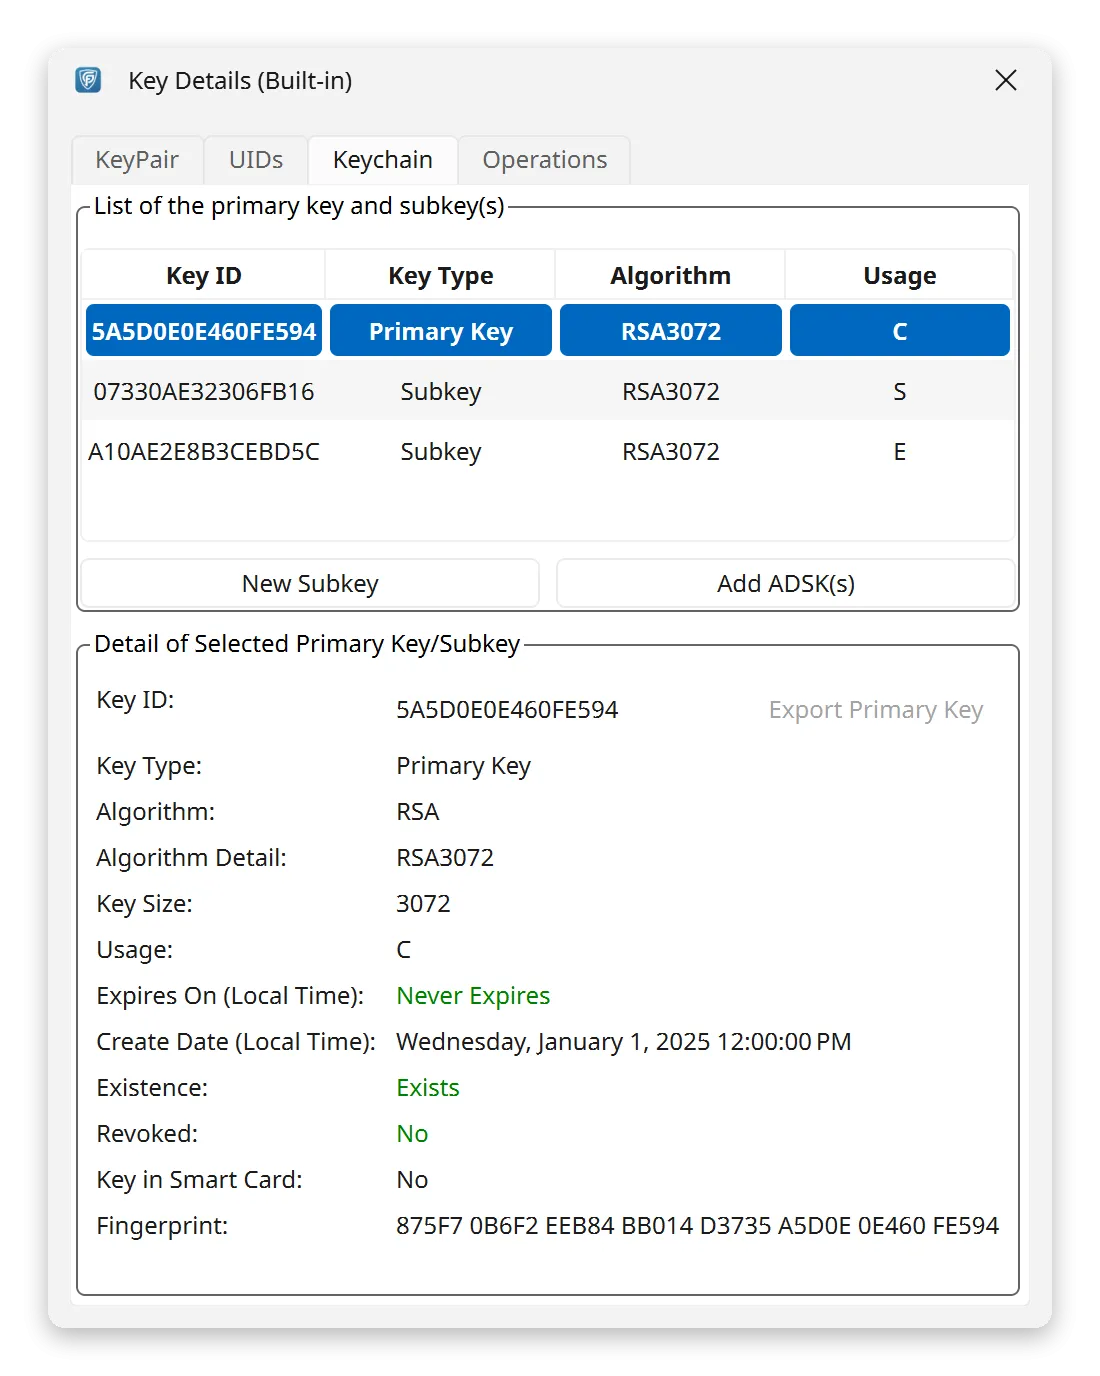
The Keychain tab lists the primary key and all subkeys. For each one, the list shows its Key ID, Key Type, Algorithm and Usage. If there are more than five, scroll the list.
Click a row to see all its details below the list, such as its size, dates and fingerprint. Here, too, you can click the Key ID or the fingerprint to copy it.
Key in Smart Card
Section titled “Key in Smart Card”The Key in Smart Card field shows Yes if a (sub)key’s private part has been moved to a hardware smart card, and No if not.
- When you move a key to a smart card, its private part goes onto the card and is removed from your key database.
- This can’t be undone. The private key now lives only on the card. You can’t copy it back.
- This protects the key well against malware and theft. To sign or decrypt with that key, the card must be plugged in and unlocked.
What You Can Do to a Single Subkey
Section titled “What You Can Do to a Single Subkey”Right-click a subkey in the list for actions that apply to just that one:
- Export: save this subkey to a file. See Subkeys.
- Edit Expire Date: give this subkey its own expiry date.
- Change Passphrase: set a new passphrase for this subkey alone. The others keep theirs. New in v2.2.2.
- Move to Card GnuPG only: move this
subkey onto a smart card. See
OpenPGP Smart Cards. This needs the GnuPG engine and
a GnuPG smart card service (
scdaemon) that is new enough. - Revoke: mark this subkey as no longer to be used.
- Delete: remove this subkey from your key.
Items your OpenPGP engine cannot do are left out of the menu. Items that do not fit the row you clicked are greyed out.
Operations
Section titled “Operations”These actions are on the Operations tab. What you can do here depends on whether you have only the public key, or the private key too.
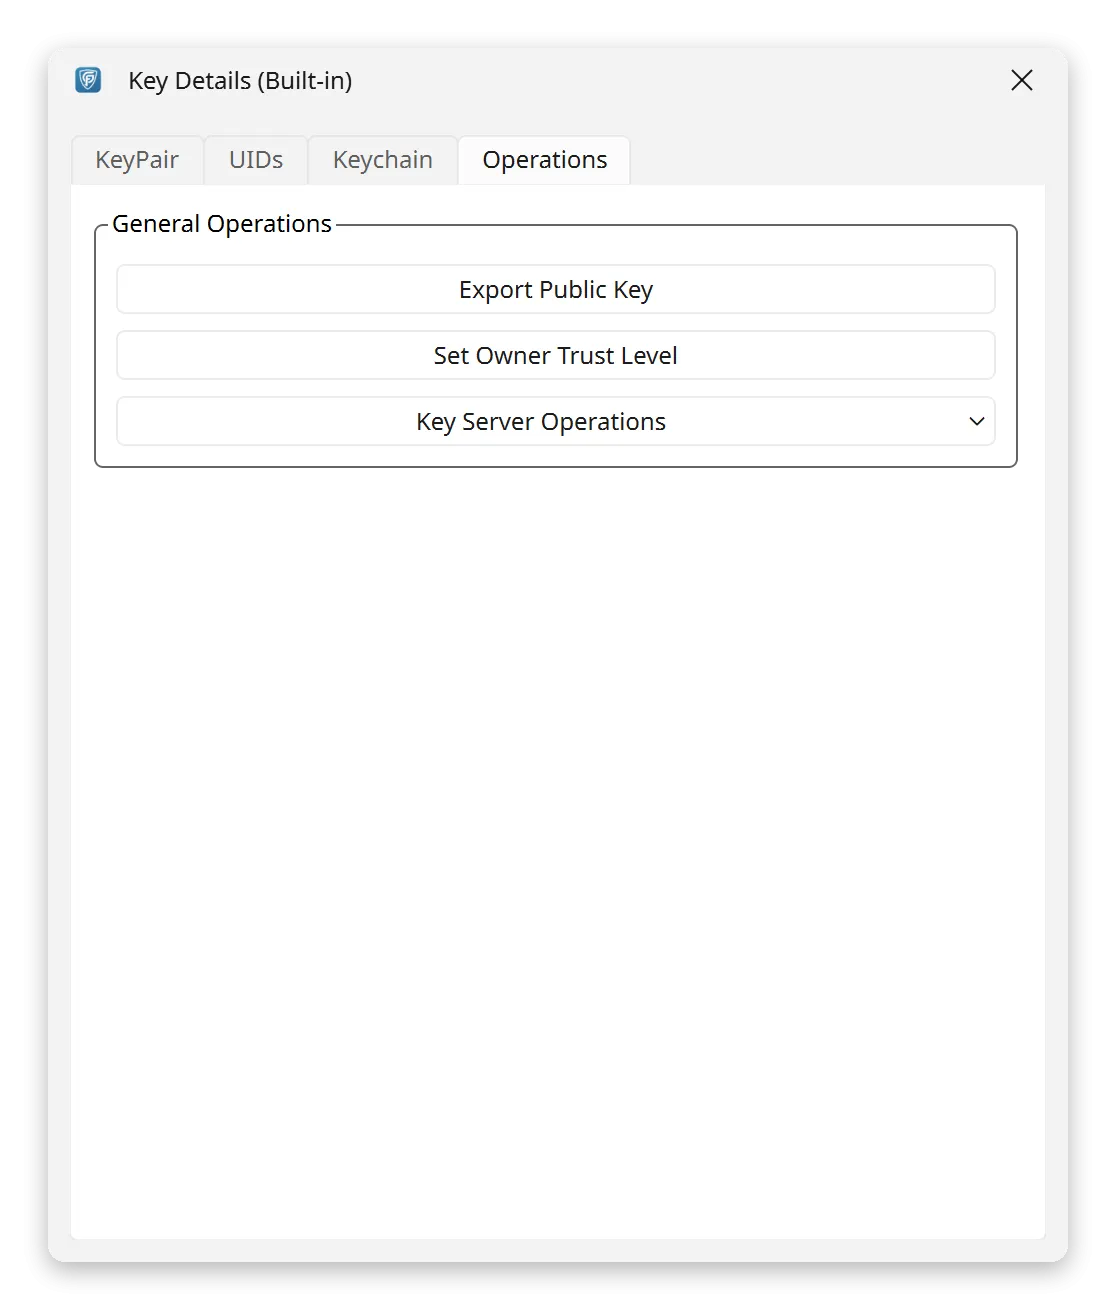
On a Public Key
Section titled “On a Public Key”These are the actions available for a public key.
Export Public Key
Section titled “Export Public Key”Saves the public key to a file, ready to share with others, upload to a key server, or back up.
Set Owner Trust Level
Section titled “Set Owner Trust Level”Sets how much you trust this key’s owner to check and certify other people’s keys. This changes how much weight GnuPG gives to the certifications that owner makes. See Trust Chain Management.
Key Server Operations
Section titled “Key Server Operations”A button with a menu for working with key servers (websites where public keys are stored and shared). It has three choices:
- Publish Public Key to Key Server: upload the public key.
- Refresh Public Key From Key Server: get the latest copy of the public key.
- Check Publication Status: ask the key server whether it has this key.
See Key Server Operations for details.
This button comes from the KeyServerSync module. If that module is turned off, the button is not there. See Module Controller.
On a Private Key
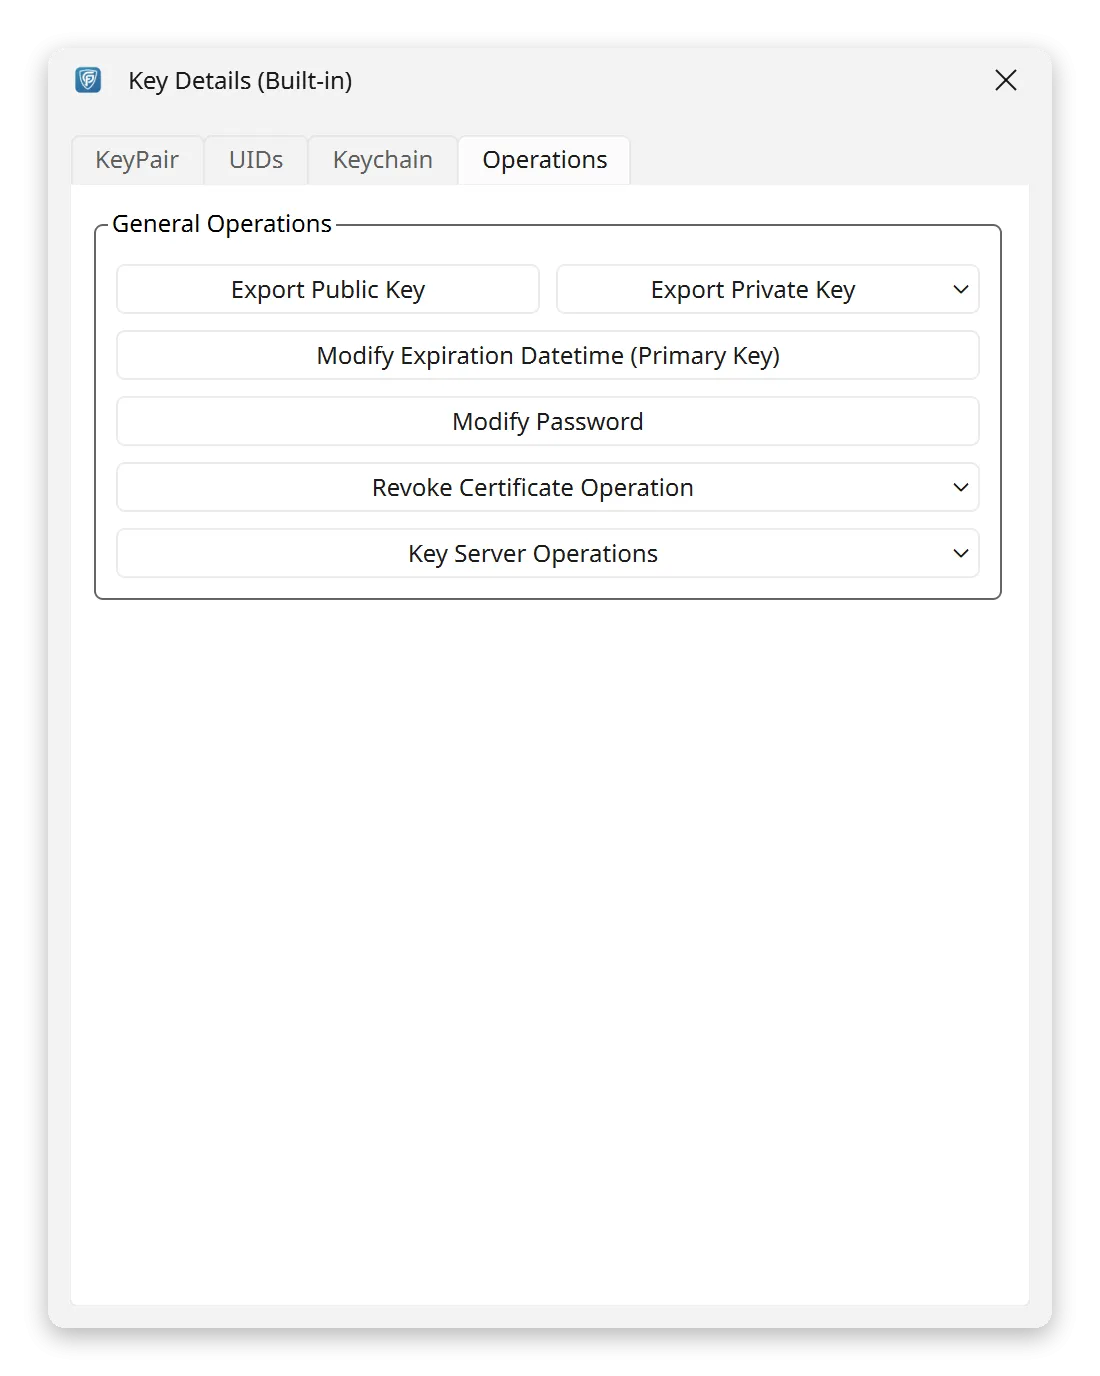
Section titled “On a Private Key”When the key pair includes a private key, you get more actions.
The last three buttons below (Modify Expiration Datetime (Primary Key), Modify Password and Revoke Certificate Operation) are only shown when the private part of the primary key is present.
Export Public Key
Section titled “Export Public Key”The same as for a public key. See above.
Export Private Key
Section titled “Export Private Key”A button with a menu. It has two choices: Export Full Secret Key and Export Shortest Secret Key. For what each one includes, see Export a Private Key.
Modify Expiration Datetime (Primary Key)
Section titled “Modify Expiration Datetime (Primary Key)”Changes the date and time when the primary key expires. Use it to keep the key valid for as long as you need.
Modify Password
Section titled “Modify Password”Changes the passphrase that protects the private key. Do this if you think someone may know the current one.
Revoke Certificate Operation
Section titled “Revoke Certificate Operation”A button with a menu. It has two choices:
- Generate Revoke Certificate: makes a revocation certificate for the key. This is a file that lets you cancel the key later.
- Import Revoke Certificate Irreversible: imports a revocation certificate. This revokes the key, and it cannot be undone.
Revoke a key if it is lost, stolen, or no longer needed. A revoked key is marked as invalid, so nobody should use it any more. People usually upload the revoked key to a key server, so others learn about it. See Key Revocation.
Key Server Operations
Section titled “Key Server Operations”The same key server menu as for a public key: publish, refresh, or check the public key on the key server.
How a Key Shows Up in Results
Section titled “How a Key Shows Up in Results”After you verify a signature or decrypt a message, the result panel says what happened. Some lines there come from the key’s details on this page.
- Valid: the signature is correct. With the rPGP engine you see Valid, not Fully Valid. rPGP has no owner trust, so it cannot say how much you trust the signer. Check the fingerprint to be sure who signed.
- Signing Key Not Authorized: the signature is correct, but the key that made it does not have Sign in its usage. The signature is not accepted.
- Signing Key Expired: the key has expired. With the rPGP engine, if the key had already expired when the signature was made, the result says so and the signature fails.
- Symmetric Encryption Algorithm: after you decrypt a message with a key,
this line names the cipher and its mode, for example
AES256.OCB. The rPGP engine now shows this line too.