
Interface Understanding
This page is a tour of the GpgFrontend window. It shows you where each part is and what it does.
When GpgFrontend starts, a small Starting GpgFrontend window may appear first. It shows a progress bar and a line that says what is loading, such as your key databases or modules. The main window opens when loading is done.
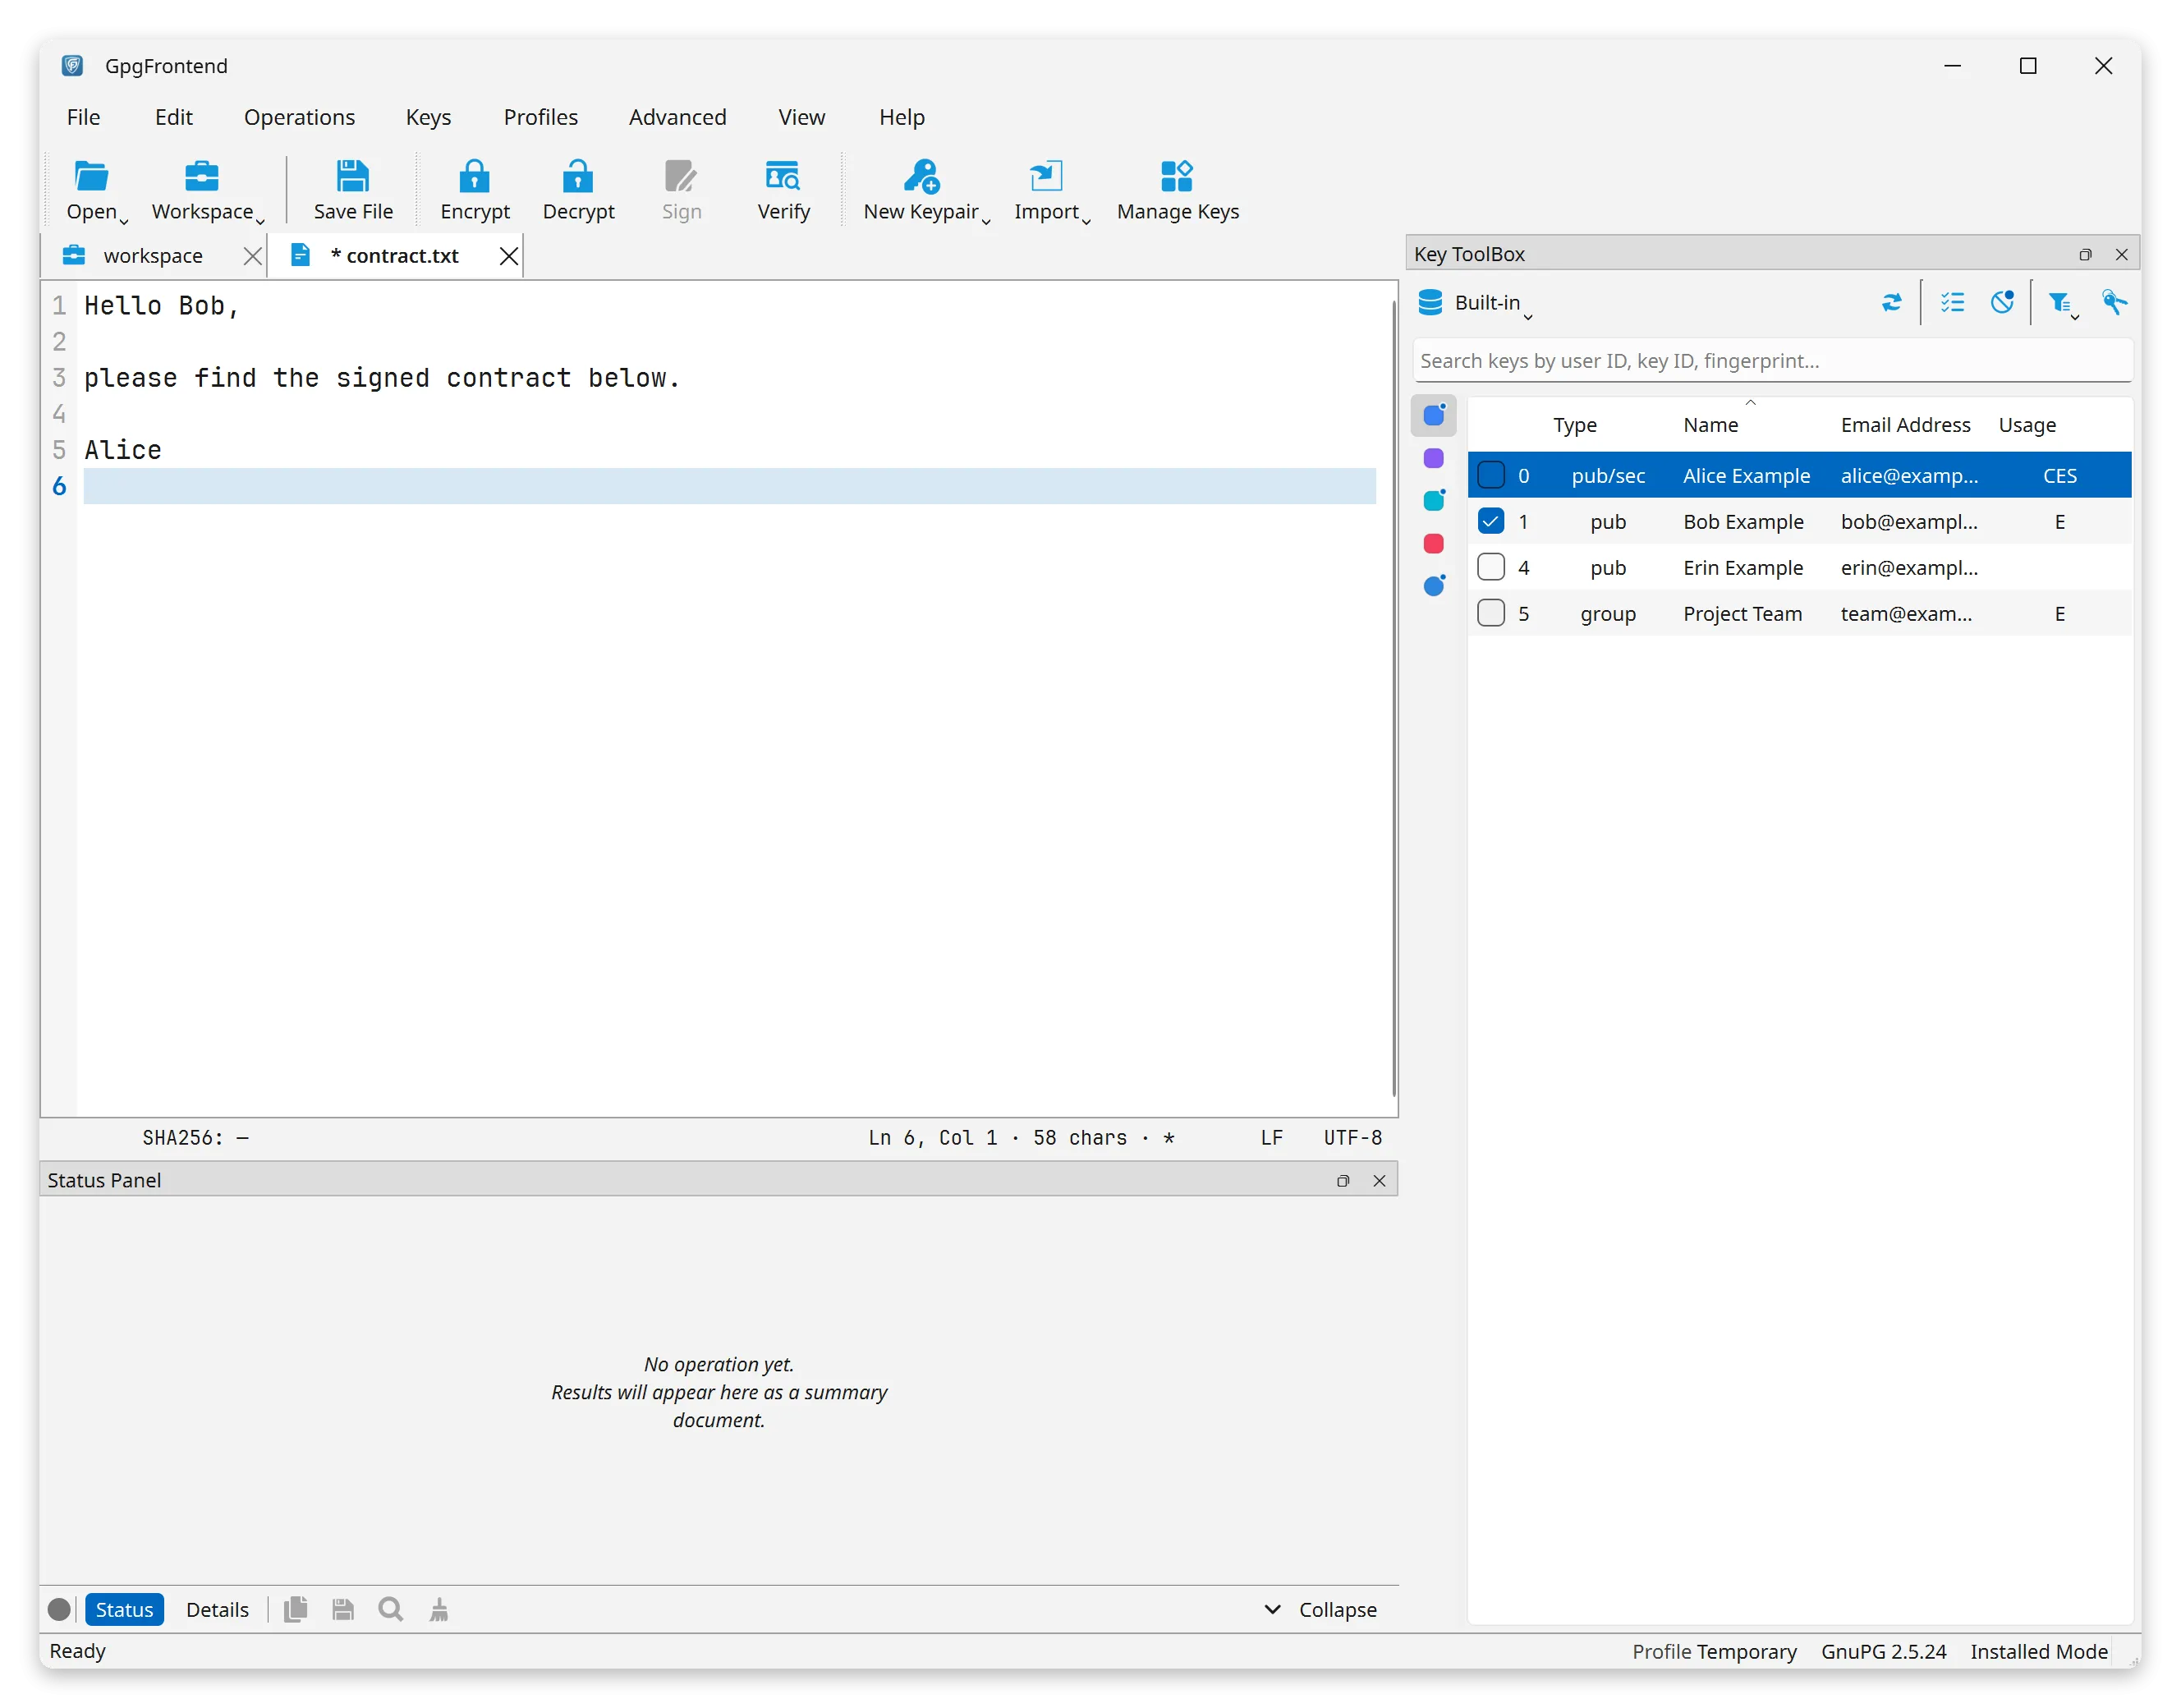
The Window at a Glance
Section titled “The Window at a Glance”The window has five main parts:
- Toolbars (top): the main buttons, like Encrypt, Decrypt, Sign, and Verify.
- Workspaces (center): tabs where you work on files, text, or email.
- Key ToolBox (right): the list of your keys.
- Status Panel (below the workspace): shows the result of each task.
- Status Bar (bottom): tells you which profile and which engine you are using. A profile is one set of settings and keys. An engine is the program that does the encryption work, such as GnuPG.
The rest of this page explains each part.
Workspaces
Section titled “Workspaces”A workspace is a tab in the middle of the window. You do your work in it. There are three kinds:
- File Panel: work on files and folders.
- Text Editor: write, encrypt, and decrypt plain text.
- Mail Editor: work with email messages.
You can open many tabs of each kind and switch between them at any time.
Right-click a tab’s title for three choices:
- Close: close the tab.
- Copy Path: copy the path of the tab’s file or folder.
- Reveal in File Browser: show the file or folder in your system’s file manager.
Copy Path and Reveal in File Browser are greyed out for a tab that is not saved to a file yet.
File Panel
Section titled “File Panel”Use the File Panel to work on files and folders. You can:
- Browse your folders and select files.
- Encrypt, decrypt, sign, or verify a file.
- Turn on Batch Mode to work on many files at once.
- Choose between text (ASCII) and binary output.
- Encrypt a whole folder as one file.
Along the top is a path bar. It shows the folder you are in, one step at a time. Click any step to jump straight there.
Files and folders you open always appear in a File Panel tab.
For the steps, see File Operations.
Text Editor
Section titled “Text Editor”In the Text Editor you type new text or open a text file. For the steps, see Text Operations.
Main Features
Section titled “Main Features”- Toolbar buttons: the buttons at the top of the window encrypt, decrypt, sign, and verify the text in the tab.
- Standard shortcuts: the usual keys work, such as Ctrl+C to copy, Ctrl+V to paste, and Ctrl+S to save.
- Plain text only: text is saved as UTF-8 with no formatting, for clarity and compatibility. Rich text editing may come later.
- Built-in font: by default the editor uses JetBrains Mono NL, a font that comes with GpgFrontend. It covers Latin, Greek and Cyrillic letters. Other scripts, such as Arabic or Chinese, use a font from your system. To pick another font, open Settings > Appearance.
- File size limit: files larger than 4 MB do not open in the Text Editor. To encrypt or sign a bigger file, select it in the File Panel instead.
- Large files: while a large file loads, you cannot edit it. Editing works again when loading is done.
Text Direction
Section titled “Text Direction”Some languages, such as Arabic and Hebrew, are written from right to left. To change the direction of the text, click View > Text Direction. Or right-click in the editor and choose Text Direction. There are three choices:
- Automatic: each line follows the direction of its own first letter. This is the default.
- Left-to-Right: every line runs from left to right.
- Right-to-Left: every line runs from right to left.
The choice applies only to the tab you are in. It is not saved: every new tab starts with Automatic.
Mail Editor
Section titled “Mail Editor”The Mail Editor works on email messages saved as .eml files. EML is a standard file format for one email message, and most email apps can read it.
- Open an email file: open an .eml file to view and edit the message.
- Write and protect email: to start a new message, click File > Workspace > Mail Editor. Write the message, then encrypt or sign it. You can also verify a signed message.
- Two views: at the top of an email tab, click Message to see the message as you would read it. Click Raw Source to see the raw text of the file.
In an email tab, the Status Panel starts as a thin bar, so the message has more room. See Making the Panel Smaller.
For everything you can do with email, see the Email overview.
The Mail Editor comes from the Email module. If that module is turned off, Mail Editor is not in the Workspace menu. See Module Controller.
Status Panel
Section titled “Status Panel”After each task, such as encrypting or verifying, the Status Panel shows what happened and whether the task worked. It also shows details such as the time, the key IDs, and the algorithms used.
Color Coding for Status
Section titled “Color Coding for Status”- Green: the task worked, no problems.
- Orange: the task worked, but with a warning to check.
- Red: the task failed, or the result cannot be trusted.
- Grey: nothing has happened yet.
Switching Views
Section titled “Switching Views”The panel has two views. Use the switch at the top of the panel to change between them:
- Status: a short, easy-to-read summary of the task.
- Details: the full, raw text straight from the engine.
GpgFrontend remembers your choice.
Making the Panel Smaller
Section titled “Making the Panel Smaller”When you need more room, you can shrink the panel:
- Click Collapse to shrink the panel to a thin bar. The bar still shows a coloured dot and the result of the last task.
- Click Expand, or double-click the bar, to open the panel again.
- Click the X on the bar to close the panel. To bring it back, click View > Status Panel.
When a new result arrives, the panel opens again by itself, even if you collapsed or closed it.
Email tabs shrink the panel to a bar on their own. If you dragged the panel out into its own window (a floating panel), it is never shrunk this way.
Reading the Report
Section titled “Reading the Report”In the Status view, each result is shown as a small report page with the heading SECURITY OPERATION REPORT. The report has one short card for each file or piece of text. Each card lists the important facts.
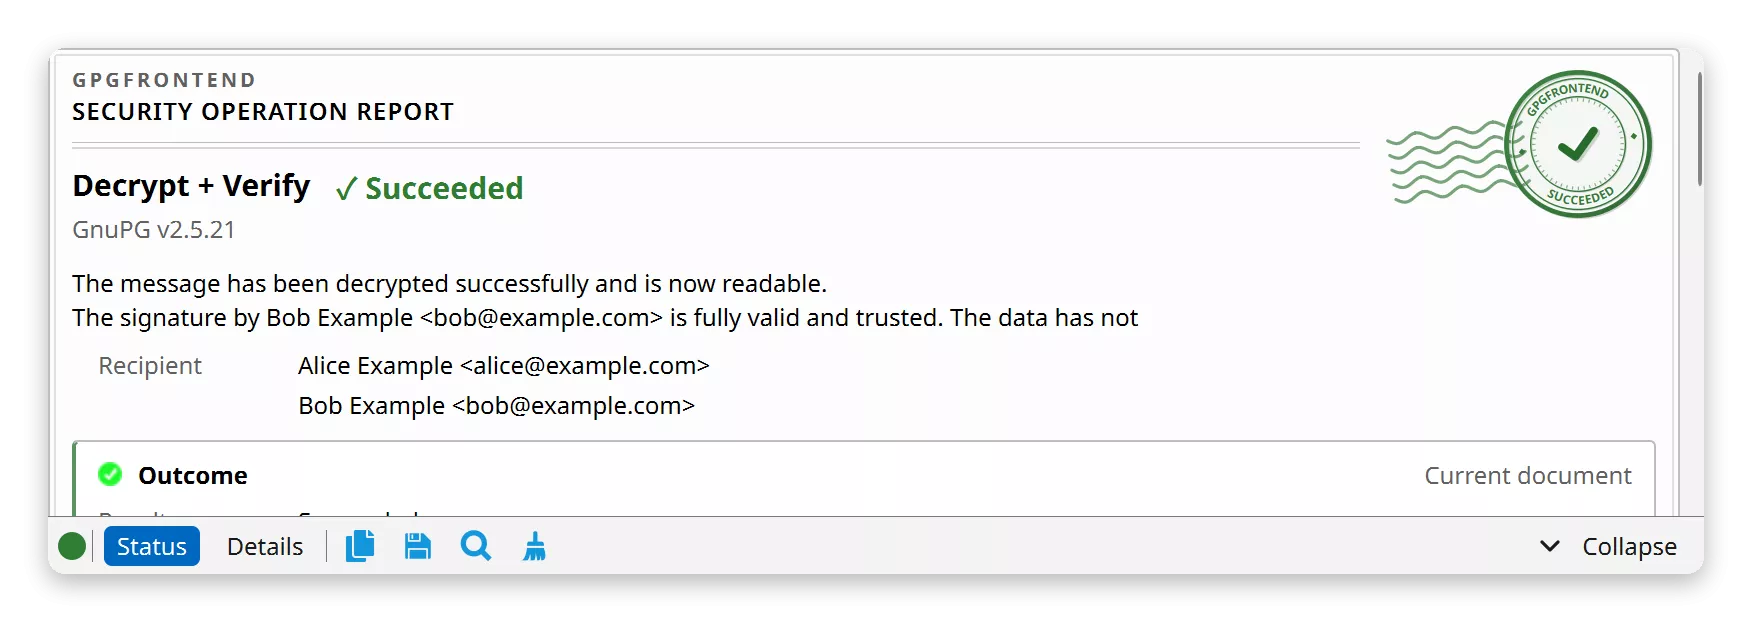
The report also has a round stamp with a check mark, a cross, or an exclamation mark. The stamp shows the result at a glance. It uses the same colours as in Color Coding for Status.
Panel Actions
Section titled “Panel Actions”- Copy: copies the status text to the clipboard.
- Save: saves what the panel shows. What you get depends on the view.
- In the Status view, you get the report as a picture (a PNG file).
- In the Details view, you get the text as a plain text file.
- Magnify: opens the report in a bigger view. You can only use it while the Status view shows a report.
- Clear: empties the panel, ready for the next task.
Key ToolBox
Section titled “Key ToolBox”On the right side, the Key ToolBox lists all your keys: public keys, private keys, and key groups.
Main features:
- Selection: tick the boxes to pick keys for a task. With the keyboard, move to a key and press Space to tick or untick it.
- Type / Usage / Email: see at a glance what each key is for.
- Search: the box at the top finds keys by name, email, key ID, or fingerprint. Press Escape to clear it.
- Categories: the thin coloured strip beside the list filters your keys. See Key Categories.
Keys that are expired, revoked, or unavailable are hidden by default. You can find them in the Manage Keys window. That window is also where you look after your keys. The Key ToolBox is only for picking them. See Manage Your Keys.
The Small Buttons Above the List
Section titled “The Small Buttons Above the List”- Refresh: read your keys again from disk.
- Check All and Uncheck All: tick or untick every key in the current category. The uncheck button shows a small count of how many keys are ticked right now.
- Columns: choose which columns to show, and reset their widths.
- New Key Group: make a group from the keys you have ticked.
- Key database button: switch between key databases. The button shows the name of the one you are in. See Key Database.
Right-Click a Key
Section titled “Right-Click a Key”Right-click a key in the Key ToolBox to work with it straight away:
- Append Public Key to Editor: add the public key block to the text in the current tab.
- Append Create DateTime to Editor, Append Expire DateTime to Editor and Append Fingerprint to Editor: add that detail to the text.
- Copy Email, Copy Default UID and Copy Key ID: copy that detail to the clipboard.
- Set Owner Trust Level: say how much you trust the key’s owner. See Trust Management. This needs the GnuPG engine.
- Add To Category: put the key in one of your categories.
- Show Key Details: open the key’s details window.
The KeyServerSync module adds Publish Public Key to Key Server and Refresh Public Key From Key Server to this menu. See Key Server Operations.
Reading the Key ToolBox Table
Section titled “Reading the Key ToolBox Table”The Type, Usage and Status columns use short codes. Here is what they mean.
- Type:
pub: a public key (for encryption or verification).pub/sec: a key pair with both a public and a private key.pub/sec#: a key pair whose primary private key is not on this computer.pub/sec^: a key pair stored on a smart card.group: a key group (several public keys used together as one recipient).
- Usage (what the key can do):
C(Certification): can sign other keys (usually primary keys only).E(Encryption): can encrypt data to this key.S(Signing): can create digital signatures.A(Authentication): can be used to log in (for example, SSH).
- Status (whether the key is fit to use):
OK: nothing wrong with it.Expiring Soon: still works, but will expire soon.Expired,Revoked,Disabled: cannot be used.
Rows are tinted to match the Status column, so a problem key stands out at a glance.
Use the Columns button to show or hide columns such as Expire Date and Status. Each key list remembers its own columns. So the Key ToolBox can show a few columns while the Manage Keys window shows many.
Toolbars
Section titled “Toolbars”The toolbars at the top hold buttons for the main tasks. There are three toolbars: File, Operations and Keys. Here are their buttons, from left to right:
- Open: open a file or folder in the File Panel.
- Workspace: open a new tab (File Panel, Text Editor or Mail Editor).
- Save File: save the file in the current tab.
- Encrypt: lock the selected files or text for the chosen recipients.
- Decrypt: unlock the selected files or text. You don’t need to pick a key. GpgFrontend finds the right private key for you.
- Sign: sign the selected files or text with your private key.
- Verify: check the signature on the selected files or text.
- New Keypair: make a new key pair. Press and hold the button, or right-click it, for Quick Generate. That makes a key in one click.
- Import: add existing public or private keys.
- Manage Keys: open the key management window.
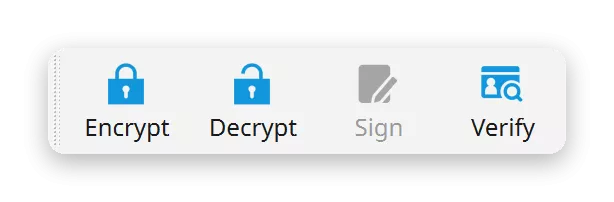
To hide or show a toolbar, open the View menu and click its name. Two more toolbars are hidden at first: Edit (Copy, Paste, Select All) and Text Tools (Quote, Remove spacing).
Encrypt & Sign, Decrypt & Verify and Sym. Encrypt are not on the toolbar at first. You can always find them in the Operations menu, or add them to the toolbar (see Customization).
Buttons With More Than One Action
Section titled “Buttons With More Than One Action”When you add more actions to the toolbar, related actions share one button:
- The Encrypt button can hold Encrypt, Encrypt & Sign and Sym. Encrypt.
- The Decrypt button can hold Decrypt and Decrypt & Verify.
Here is how to use such a button:
- Click it to run the action shown on the button.
- Right-click it, or press and hold it, to see all its actions. Then pick the one you want.
- If the action shown on the button can’t be used right now, a click opens the list instead. So you can still reach the other actions.
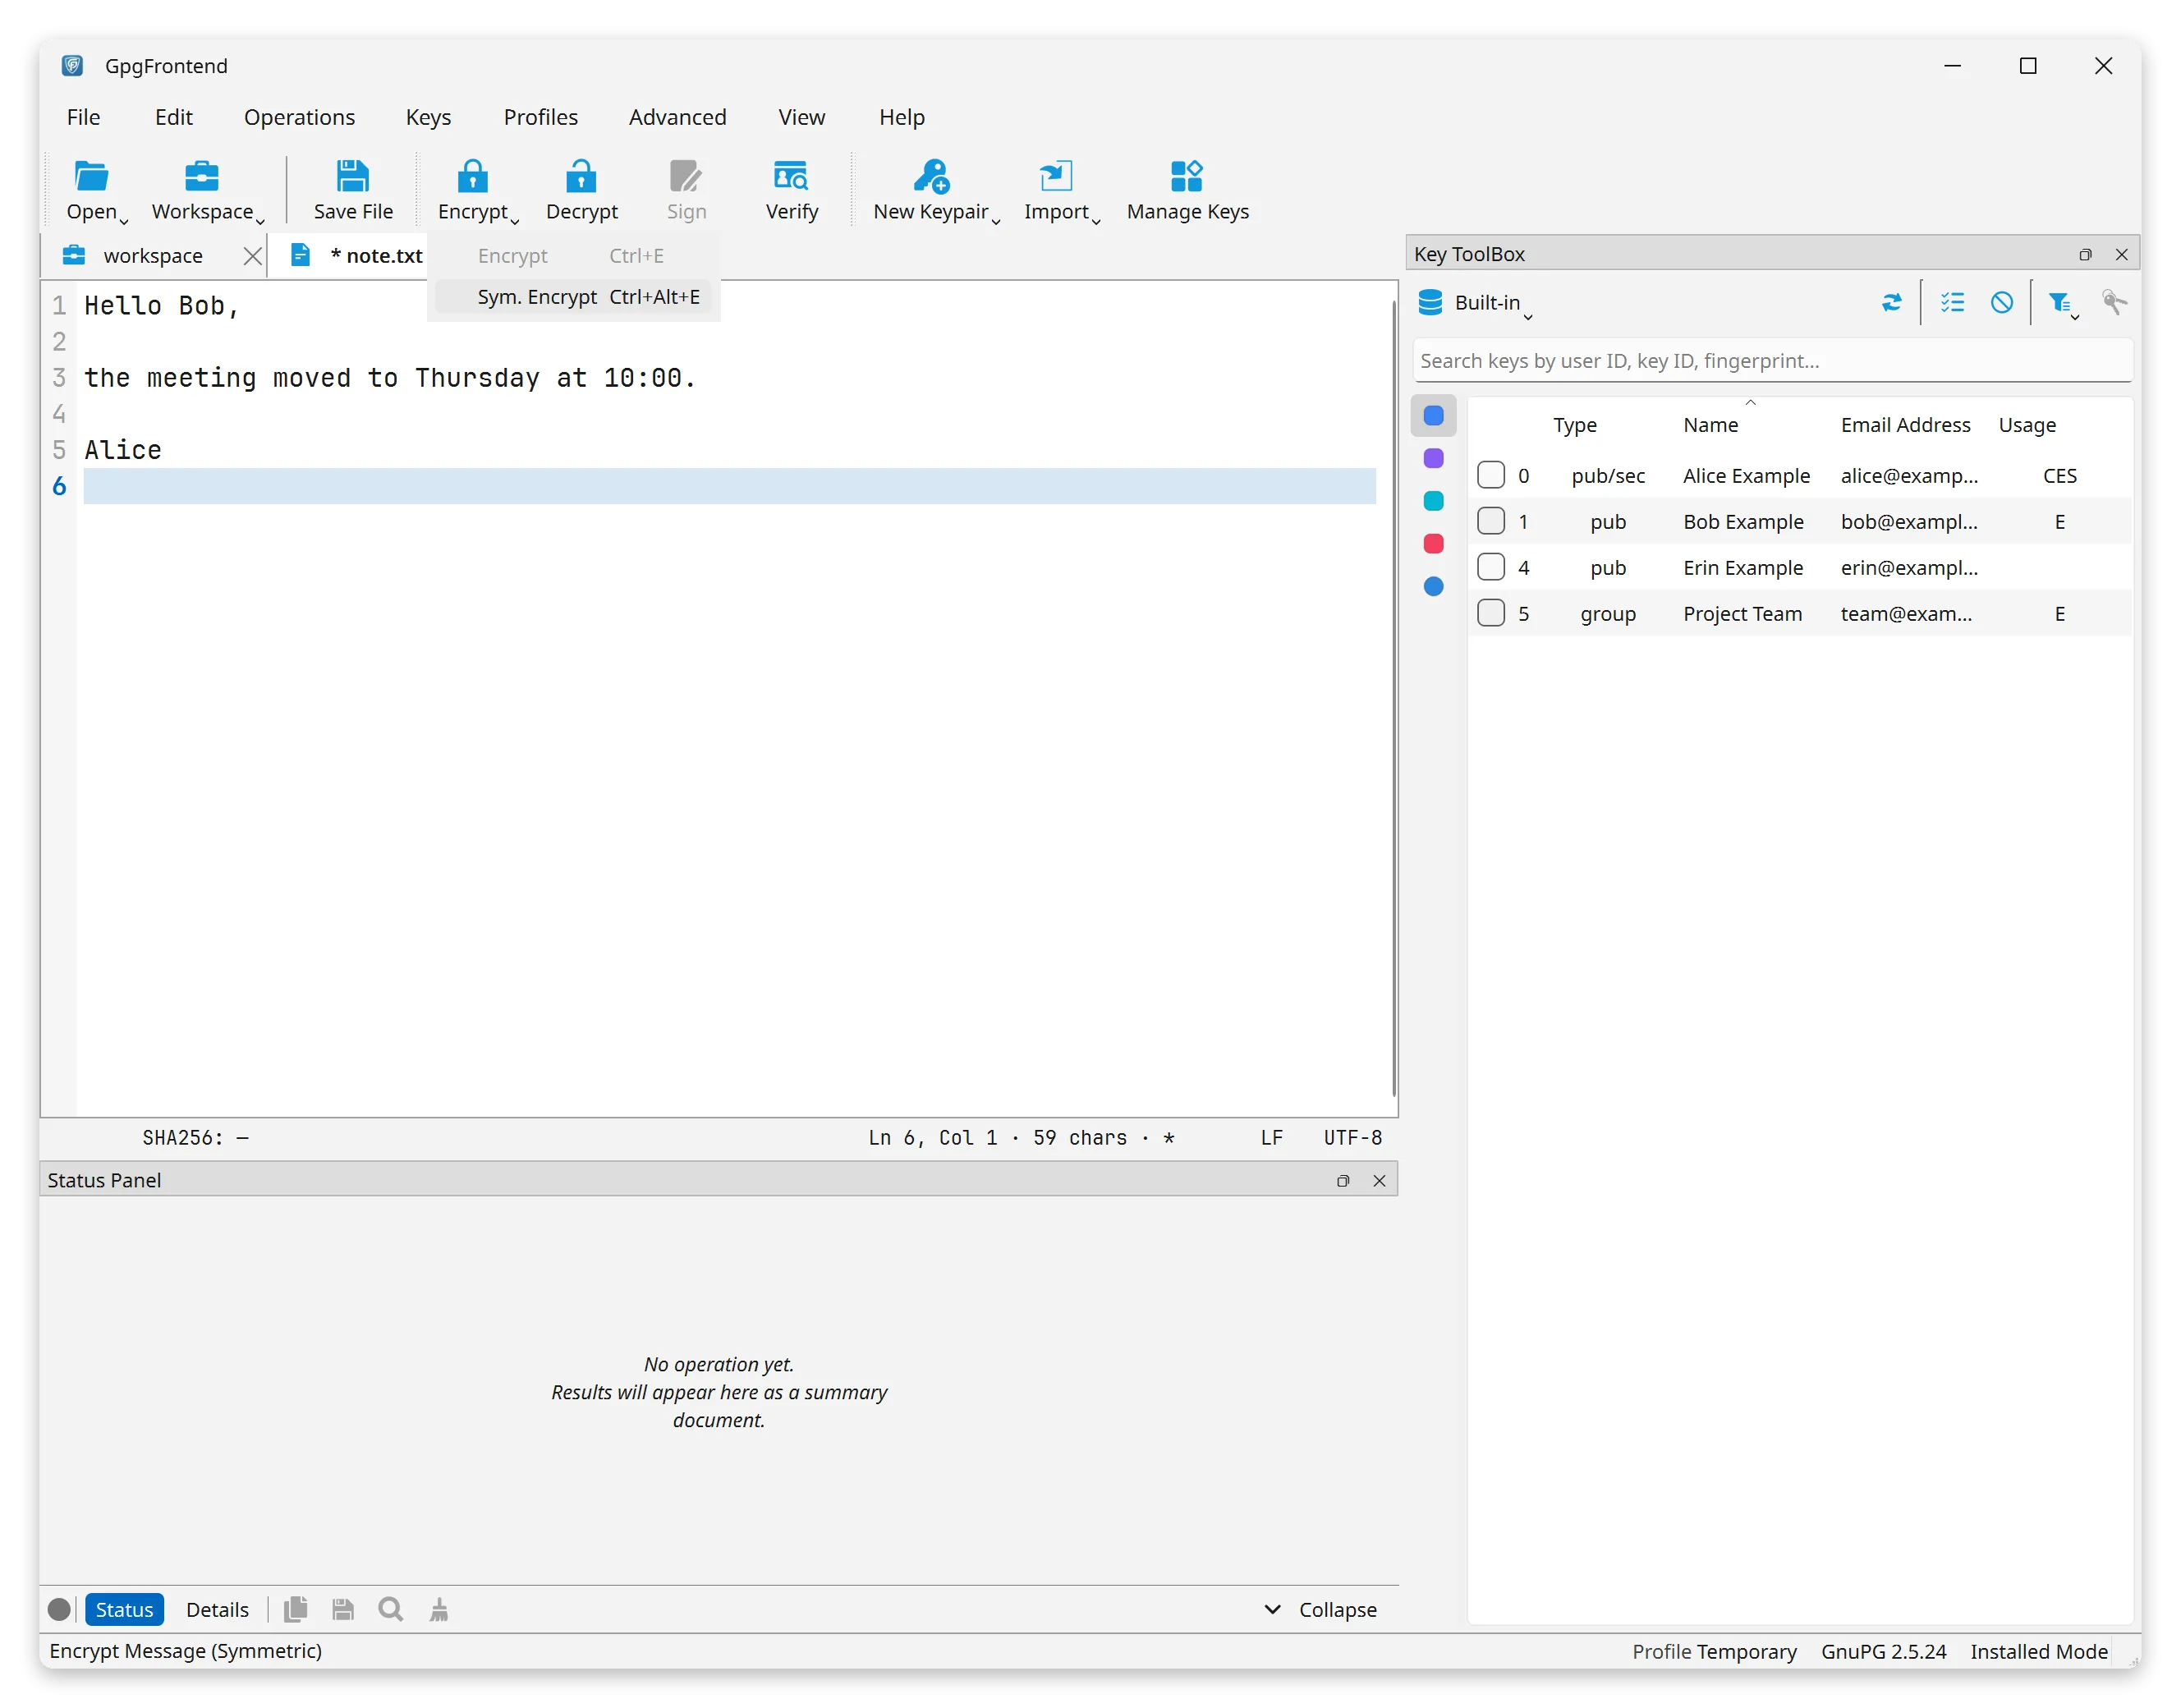
Sym. Encrypt is never the action shown on the button. You always pick it from the list.
Customization
Section titled “Customization”You can hide buttons you don’t use, or add ones you use often:
- Open Settings and go to Appearance.
- Under Toolbar, tick what you want in the Actions list. The list is arranged by button: the Encrypt row, then the Decrypt row, then Sign and Verify.
- If you ticked more than one action in the Encrypt or Decrypt row, an On click choice appears for that row. Pick the action you want a plain click to run. The other ticked actions stay in the right-click list.
On click only lists the actions you ticked. It does not show at all when a row has only one action ticked.
At first only Encrypt, Decrypt, Sign and Verify are ticked.
One of the other actions is Sym. Encrypt. It encrypts with a password instead of a key. See Symmetric Crypto.
Instant messaging has no toolbar buttons. Its actions are in the Operations menu. See Instant Messaging.
Status Bar
Section titled “Status Bar”Along the bottom of the window, on the right, three small labels tell you what you are working with.
- Profile: the name of the profile this window is using. A profile is one set of settings and keys. Click the label to manage your profiles. See Profiles. In the Mac App Store Lite edition this label only shows the name. Clicking it does nothing.
- The engine label: the OpenPGP engine and its version, such as
GnuPG 2.4.3. Point at the label to see which key database you are in. - The mode label: Installed Mode or Portable Mode. See Portable Mode.
Click the engine label or the mode label to open the Status tab of the About window. It shows these details in full.